
Compromised Write-Up
Scenario Overview: Our SOC team detected suspicious activity in network traffic, which led to the discovery that a machine was compromised and sensitive company information had been stolen. It's our job to investigate the incident and determine what happened and what data was taken.
1. What is the IP address used for initial access?
The first step is to examine the contents of the provided zip file, which contains a pcap file. We load the pcap file into NetworkMiner, a network forensics tool, to simplify the investigation.
Solution: Under the Sessions tab in NetworkMiner, we can identify the initial access IP by checking the network traffic. This is the IP that first initiated the connection to the compromised machine.

2. What is the SHA256 hash of the malware?

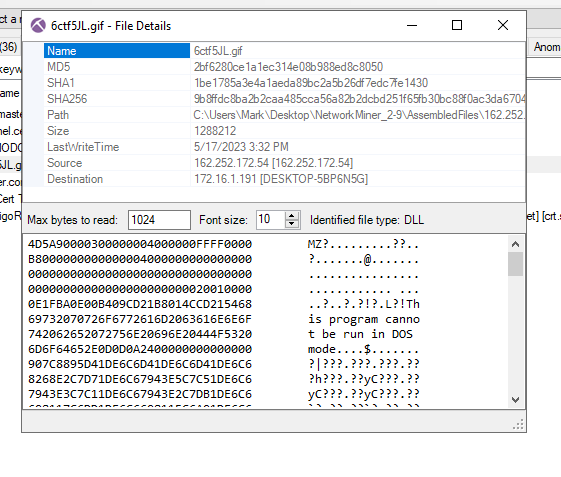
Next, we need to locate the malware within the pcap file. Using NetworkMiner, we navigate to the Files tab to search for any suspicious files.
Solution: We find a file with a .gif extension. Although it appears to be an image file, right-clicking and selecting File Details reveals that it is actually a PE file (Portable Executable), which is likely our malware.
3. What is the Family label of the malware?

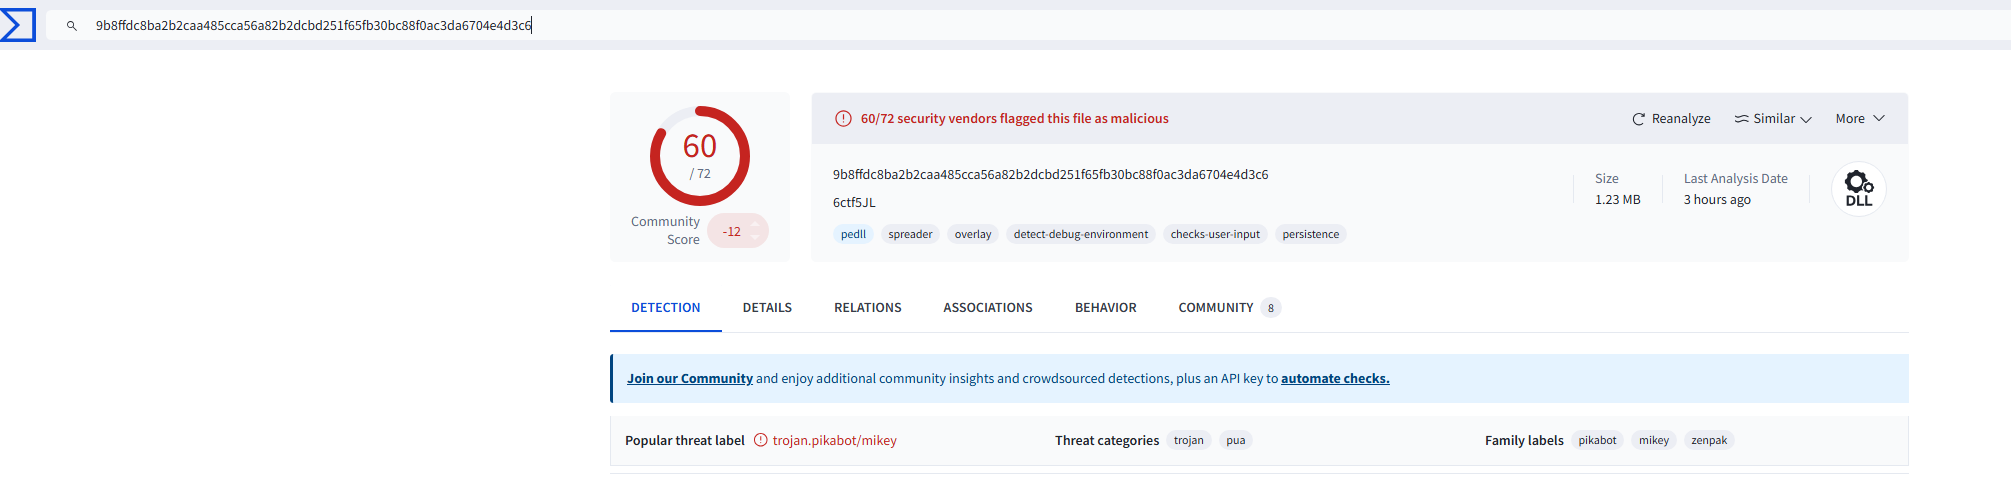
After identifying the file as malware, we copy its SHA256 hash and submit it to VirusTotal for further analysis.
Solution: In VirusTotal, we paste the hash to search for any related information. The Family label provides us with details on which malware family this sample belongs to.
4. When was the malware first seen in the wild (UTC)?
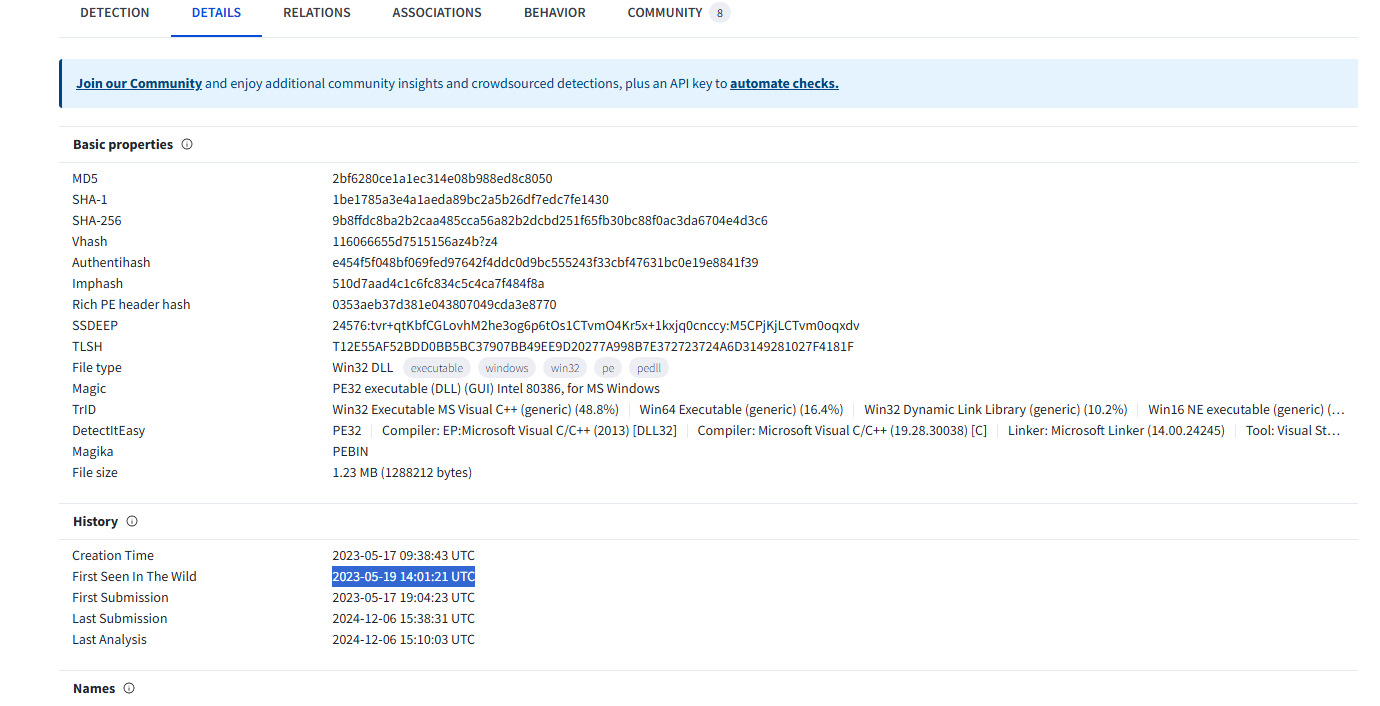
In the VirusTotal Details tab, we can find information about the malware, including when it was first observed in the wild.
Solution: The First Seen timestamp provides the exact UTC time when this malware was first detected.

5. The malware used HTTPS traffic with a self-signed certificate. What are the ports, from smallest to largest?
To find out which ports were used for HTTPS traffic, we look at both NetworkMiner and Wireshark. The easiest way to do this is to use NetworkMiner for session details and Wireshark to filter for TLS traffic.
Solution: In NetworkMiner, we filter for Server Host to identify servers involved in the connection. In Wireshark, we filter for tls traffic to locate the TLS sessions. Cross-referencing the two will show us the port numbers, which are not the standard port 443.

6. What is the id-at-localityName of the self-signed certificate associated with the first malicious IP?

To gather information about the self-signed certificate, we first filter for the Server Hello in Wireshark.
Solution: We use the filter ssl.handshake == 11 in Wireshark to locate the handshake packets. Drilling down into these packets will reveal the certificate details, including the id-at-localityName.

7. What is the notBefore time (UTC) for this self-signed certificate?

The notBefore field in the self-signed certificate indicates when the certificate was valid from.
Solution: This information can be found in the same location as the answer to question 6, within the Validity section of the certificate.
8. What was the domain used for tunneling?
To determine the domain used for tunneling, we return to NetworkMiner and check the DNS traffic.
Solution: By navigating to the DNS tab in NetworkMiner, we can find the domain name used by the malware for tunneling purposes.

Conclusion: By carefully analyzing the pcap file using tools like NetworkMiner and Wireshark, and validating the findings in VirusTotal, we were able to identify critical details about the compromise, including the IP address used for initial access, the malware’s hash and family, certificate details, and the domain used for tunneling.
