
HTB Sherlock OpSalwarKameez24-1: Super-Star Write-Up
Overview
In this challenge, we were tasked with investigating a malicious Electron-based application. The challenge involved decoding obfuscated data, extracting key details from the application, and analyzing network traffic to uncover the attacker’s actions. Through a combination of reverse engineering, network analysis, and careful inspection, we were able to solve the challenge step-by-step.
Below is a detailed guide on how we solved the challenge:
Step 1: Analyzing the Downloaded Files
We began by downloading the zip folder and uploading it to a Flare-VM for analysis. The zip contained several files, most notably the Electron-Coupon.exe binary.
Action:
- We used 7zip to unzip the file and noticed several interesting components. We uploaded Electron-Coupon.exe to PeStudio for static analysis, which helped identify the presence of potentially malicious activities within the binary.
Step 2: Inspecting the Process with Process Hacker and Process Monitor
To observe the behavior of the running binary, we used tools like Process Hacker and Process Monitor. While we saw the process running in Process Hacker, we couldn’t locate it in Process Monitor.
Action:
- After clearing the filters in Process Monitor, we found a process named Coupon.exe. Upon inspecting it, we noticed that the process created many files, one of which was located in:
```
C:\Users\username\AppData\Local\Temp\xxxxxxxxxxxx\
```
- We explored this folder and found several files related to the application, which would be useful in answering some of the questions in the challenge.
Step 3: Investigating the Electron App’s Startup Script
The first question asked:
"Which option has the attacker enabled in the script to run the malicious Node.js application?"
We discovered that the application was an Electron app, and upon deeper inspection of the files in the app.asar.unpacked directory, we found a package.json file, which typically contains the app’s configurations.

Action:
- We found that nodeIntegration was enabled in the Electron app, allowing Node.js code to run within the app’s renderer process. This was the key feature that enabled the malicious behavior.

Step 4: Investigating the WebSocket for Keystroke Transmission
The second question asked:
"What protocol and port number is the attacker using to transmit the victim's keystrokes?"
In the unpacked contents of the Electron app, specifically inside the public directory, we located a file named keylogger.js. By analyzing this file, we found the attacker was using the WebSocket protocol to transmit keystrokes.
Key Findings:
- The WebSocket URL was:
```
ws://0.0.0.0:44500
```
- This indicates that the attacker used WebSockets on port 44500 for keystroke transmission.

Step 5: Analyzing XOR Key for Shellcode Decoding
The third question asked:
"What XOR key is the attacker using to decode the encoded shellcode?"
We found that the preload.js file contained a b64string variable, which appeared to hold the encoded shellcode. Upon further analysis, we found a keyBuf variable, which was likely used to decode the shellcode.
Action:
- We used Wireshark to filter for HTTP GET requests and discovered that the keyBuf was sent in an HTTP request body. This allowed us to retrieve the XOR key and decode the shellcode.

Step 6: Extracting the IP Address and Port Number from the Payload
The fourth question asked:
"What is the IP address, port number, and process name encoded in the attacker’s payload?"
Action:
- After decoding the payload, we successfully extracted the IP address and port number. The attacker had embedded this information in the payload, which we were able to decode using the XOR key obtained earlier.

Step 7: Investigating the Reverse Shell Commands
The fifth question required us to find:
"What two commands did the attacker execute after gaining the reverse shell?"
Action:
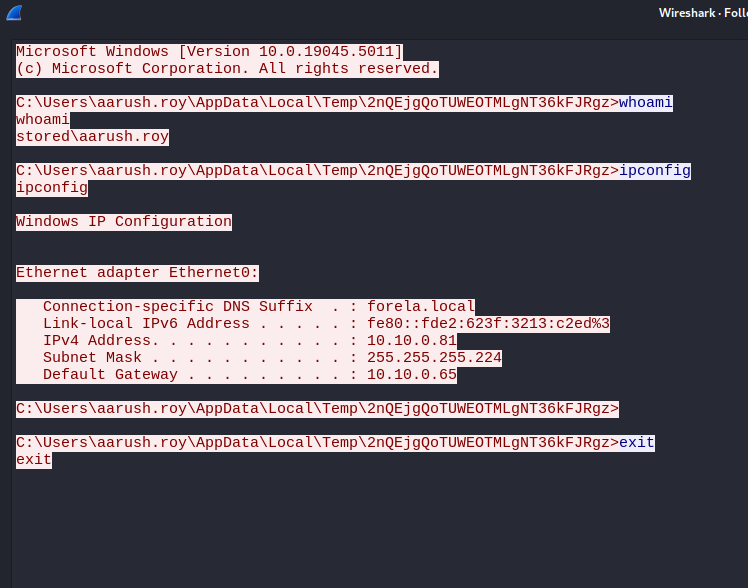
- We returned to Wireshark and filtered the network traffic using the IP and port number of the reverse shell. By following the TCP stream, we identified the exact commands sent by the attacker once the reverse shell was established.
Step 8: Identifying the Node.js Module and Function for Shellcode Execution
The sixth question asked:
"Which Node.js module and its associated function is the attacker using to execute the shellcode within V8 Virtual Machine contexts?"
Key Findings:
- The attacker used the vm module, which is designed to execute JavaScript code within a V8 virtual machine context. Specifically, the attacker called:
```javascript
var vm = require("vm");
var script = new vm.Script(code);
script.runInNewContext(context);
```
- This allowed the attacker to execute arbitrary code within a controlled context.
Step 9: Extracting the Fake Discount Coupon
The final question asked:
"Extract the fake discount coupon that the attacker intended to present to the victim."
Action:
- We uploaded the script.jsc file to GHIDRA for analysis. After examining the bytecode and reverse engineering the logic, we successfully extracted the fake discount coupon intended for the victim.

---
Conclusion
This challenge required a combination of reverse engineering, network analysis, and detailed inspection of the malicious Electron application. By carefully analyzing various components such as the Node.js scripts, WebSocket communication, XOR decoding, and reverse engineering Win32 API usage, we were able to piece together the attacker’s methodology and answer each question effectively.
In the end, the solution involved:
- Identifying malicious settings in the Electron app (nodeIntegration).
- Decoding network traffic to find WebSocket-based keystroke transmission.
- Extracting and decoding XOR-encrypted payloads.
- Reverse-engineering Win32 API usage to execute the payload.
- Extracting the fake discount coupon from the decompiled script.jsc bytecode.
This challenge was an excellent opportunity to hone reverse engineering and web exploitation skills, and it provided valuable experience in handling malicious code.